Understanding the Inner Workings of a 3D Printer

You’re curious about how 3D printers work, and we’ve got all the answers for you. In this article, we’ll take a closer look at the inner workings of a 3D printer, revealing the fascinating process that turns a digital design into a physical object. From the intricate slicing of the model to the precise layer-by-layer deposition of material, we’ll guide you through the magical journey of how a 3D printer brings imagination to life. So sit back, relax, and let’s embark on this captivating exploration into the world of 3D printing.

This image is property of pixabay.com.
Basics of 3D Printing
Introduction to 3D printing
Welcome to the world of 3D printing! This groundbreaking technology allows you to turn digital designs into physical objects. 3D printing, also known as additive manufacturing, opens up a world of possibilities for creating prototypes, custom products, and more. But how does it work? Let’s dive into the basics of 3D printing and explore the key components and technologies involved.
Key components of a 3D printer
A typical 3D printer consists of several essential components that work together to bring your designs to life. These include:
- Print Bed: The platform where the object is built layer by layer.
- Extruder: The part that melts and deposits the material.
- Nozzle: The small opening through which the melted material is extruded.
- Filament: The material, such as plastic or resin, used to create the object.
- Print Head: The assembly that holds the extruder and nozzle.
- Stepper Motors: The motors that control the movement of the print head and build platform.
- Control Board: The brain of the 3D printer that coordinates all the components.
- Power Supply: Provides the necessary electricity to operate the printer.
Each of these components plays a crucial role in the 3D printing process, working together to produce intricate and customized objects.
Types of 3D printing technologies
There are various types of 3D printing technologies, each employing different methods and materials to bring your designs to life. Some popular 3D printing technologies include:
-
Fused Deposition Modeling (FDM): This is the most commonly used 3D printing technology. It works by melting a filament and depositing it layer by layer to create the object. FDM printers are affordable, versatile, and can work with a wide range of materials.
-
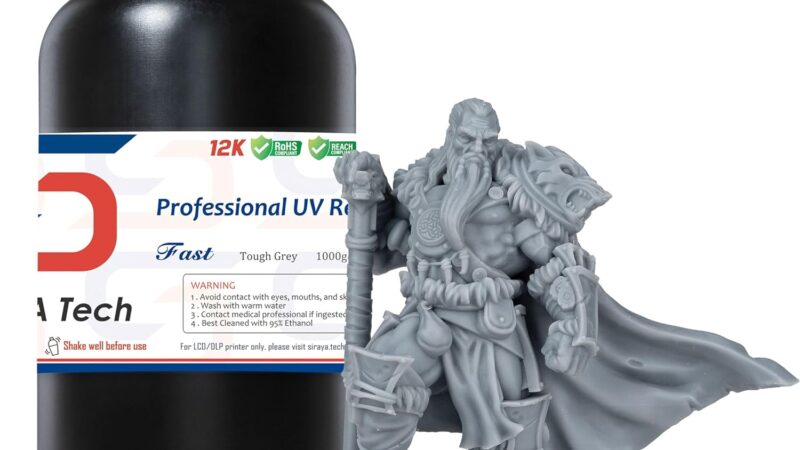
Stereolithography (SLA): SLA printers use a liquid resin that is cured layer by layer using a UV laser. This technology offers high-resolution prints with smooth surfaces and is often used in industries such as jewelry making and dentistry.
-
Selective Laser Sintering (SLS): SLS printers use a laser to selectively fuse powdered materials, such as nylon or metal, into solid objects. It allows for the creation of complex and durable prints and is commonly used in industrial applications.
-
Digital Light Processing (DLP): DLP printers use a projector to cure liquid resin layer by layer. This technology is similar to SLA but offers faster print speeds and is often used for dental and jewelry applications.
These are just a few examples of the wide range of 3D printing technologies available today. Each technology has its own advantages and is suited for different applications.
Inner Workings of a 3D Printer
3D printer software
To bring your digital designs to life, you need specialized software that controls the 3D printing process. This software, often referred to as slicers, takes your 3D model and prepares it for printing. Some popular software options include Ultimaker Cura, PrusaSlicer, and Simplify3D.
Steps involved in the printing process
The 3D printing process consists of several steps, each crucial for creating a successful print. Let’s walk through the key steps involved:
-
Step 1: Designing or obtaining a 3D model: The first step is to create or obtain a 3D model using Computer-Aided Design (CAD) software or by downloading pre-existing designs from online repositories.
-
Step 2: Slicing the 3D model: Once you have a 3D model, you need to slice it into thin layers. The slicing software takes your model and generates a set of instructions that the 3D printer can understand. These instructions include details like layer height, print speed, and infill density.
-
Step 3: Preparing the 3D printer: Before initiating the print, you need to prepare the 3D printer. This involves ensuring the print bed is clean and level, loading the appropriate filament or resin, and selecting the desired print settings on the printer’s control panel.
-
Step 4: Printing the object layer by layer: Once everything is set up, you can start the 3D printing process. The printer moves the print head and build platform according to the instructions provided by the slicing software, depositing material layer by layer to gradually build the object.
-
Step 5: Cooling and post-processing: Once the print is complete, it’s important to let it cool down before handling it. Depending on the material and desired finish, post-processing techniques like removing support structures, sanding, polishing, painting, or applying additional coatings may be required.
Understanding the materials used in 3D printing
One of the key factors that contribute to the versatility of 3D printing is the wide range of materials that can be used. These materials are typically available in filament-based, resin-based, or powder-based forms, each offering unique properties and applications.
3D Printer Software
Slicing software
Slicing software plays a crucial role in the 3D printing process. It takes your 3D model and slices it into numerous thin layers, generating instructions for the printer to follow. These instructions include details like layer height, print speed, and infill density, which determine the quality and strength of the finished print. Some popular slicer options include Ultimaker Cura, PrusaSlicer, and Simplify3D, each offering a user-friendly interface and a wide range of customizable settings.
Importing and preparing 3D models
To get started with 3D printing, you need a 3D model. This can be created from scratch using Computer-Aided Design (CAD) software, or obtained from online repositories that offer an extensive collection of pre-designed models. Once you have a 3D model, you can import it into the slicing software and make any necessary adjustments to ensure a successful print. This may involve scaling the model, adding support structures for overhangs, or optimizing the orientation for better printability.
Configuring printing settings
Before starting a print, it’s important to configure the printing settings in the slicer software. This includes specifying the layer height, print speed, infill density, and other parameters that determine the final print quality. The appropriate settings may vary depending on the specific printer, material, and design requirements. It’s crucial to find the right balance between print speed and quality to achieve the desired results. Experimenting with different settings can help fine-tune the prints and optimize the overall 3D printing experience.
Steps Involved in the Printing Process
Step 1: Designing or obtaining a 3D model
To begin the 3D printing process, you first need a 3D model. This can be created using 3D design software, such as Tinkercad or Fusion 360, or obtained from online platforms that offer a vast library of pre-designed models. Whether you’re creating your own design or downloading one, it’s important to ensure that the model is suitable for 3D printing and doesn’t have any structural or geometric issues.
Step 2: Slicing the 3D model
Once you have a 3D model, the next step is to slice it into layers using slicing software. Slicing software takes your 3D model and creates a set of instructions for the 3D printer to follow. These instructions include details like layer height, print speed, and infill density. The slicing software also generates a file format, such as G-code, which contains the specific instructions needed to print your object.
Step 3: Preparing the 3D printer
Before you can start printing, it’s important to prepare your 3D printer. This involves several steps, including ensuring that the print bed is clean and level, loading the appropriate filament or resin, and selecting the desired print settings on the printer’s control panel. Some printers may require additional calibrations or adjustments to achieve optimal print quality. Taking the time to properly prepare your printer will help prevent any issues during the printing process.
Step 4: Printing the object layer by layer
With the 3D model sliced and the printer prepared, it’s time to start the print. The printer will follow the instructions from the slicing software, moving the print head and build platform to deposit material layer by layer. The build platform moves down for each new layer, allowing the previous layer to harden and create a solid foundation for the subsequent layers. This layer-by-layer approach enables the printer to create complex and intricate shapes that would be challenging or impossible to achieve with traditional manufacturing methods.
Step 5: Cooling and post-processing
Once the printing is complete, it’s important to let the object cool down before removing it from the print bed. The cooling process allows the material to solidify and stabilize, ensuring the structural integrity of the print. Depending on the material and the desired finish, additional post-processing techniques may be required. This can include removing any support structures, sanding, polishing, painting, or applying various coatings to enhance the appearance and functionality of the printed object.

This image is property of pixabay.com.
Understanding the Materials Used in 3D Printing
Filament-based Materials
Filament-based materials are the most commonly used materials in 3D printing. They typically come in the form of spools of plastic filament, which are fed into the 3D printer. Some of the popular filament-based materials include:
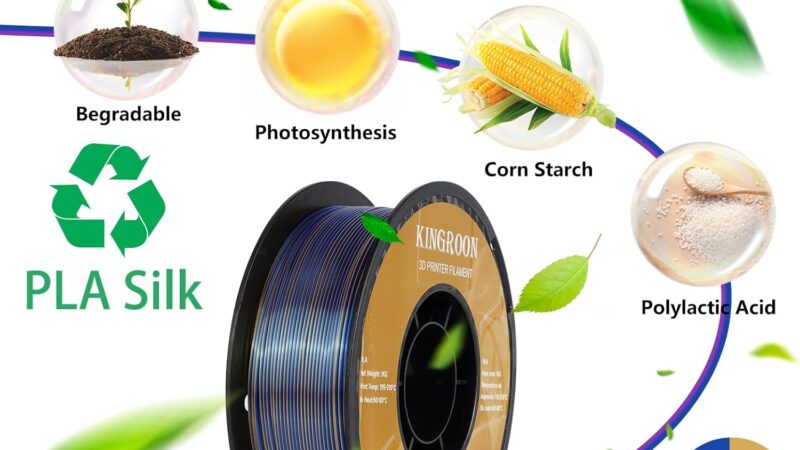
PLA (Polylactic Acid)
PLA is one of the most widely used 3D printing materials. It’s derived from renewable resources such as corn starch or sugarcane and offers several advantages, including ease of use, low odor, and biodegradability. PLA produces prints with good detail, high surface quality, and comes in a wide range of colors.
ABS (Acrylonitrile Butadiene Styrene)
ABS is another common filament material known for its strength and durability. It’s widely used in industrial applications and is known for its high-temperature resistance. ABS prints tend to have a smooth finish and can be easily post-processed using techniques like sanding or acetone smoothing.
PETG (Polyethylene Terephthalate Glycol)
PETG is a popular choice for functional parts due to its excellent strength, flexibility, and impact resistance. It offers both the strength of ABS and the ease of printing associated with PLA. PETG is also resistant to moisture and chemicals, making it suitable for a wide range of applications.
Nylon
Nylon is a versatile material known for its exceptional strength, durability, and flexibility. It offers high impact resistance and can withstand various environmental conditions. Nylon prints can be used for durable parts, functional prototypes, and applications that require mechanical strength.
Flexible filaments
Flexible filaments, such as TPU (Thermoplastic Polyurethane), allow for the creation of flexible and elastic prints. These materials are commonly used for making items like phone cases, rubber-like grips, and custom-made gaskets. Flexible filaments offer outstanding elasticity and can be used to add functional features to printed objects.
Resin-based Materials
Resin-based materials are commonly used in SLA and DLP 3D printing technologies. These liquid resins are photosensitive and are cured layer by layer to create the final object. Some popular resin-based materials include:
Standard resins
Standard resins are the most commonly used resin-based materials and offer a wide range of properties. They come in various colors and produce high-resolution prints with smooth surfaces. Standard resins are suitable for a wide range of applications, including prototyping, engineering, and design.
Engineering resins
Engineering resins are specialized resin-based materials designed to meet specific engineering requirements. These resins offer enhanced mechanical properties, such as high strength, heat resistance, and chemical resistance. Engineering resins are commonly used in industries such as automotive, aerospace, and robotics.
Dental resins
Dental resins are specifically formulated for dental applications, including the production of dental models, surgical guides, and custom orthodontic devices. These resins offer high accuracy, biocompatibility, and aesthetic qualities required for dental applications.
Jewelry resins
Jewelry resins are formulated for creating jewelry and fashion accessories. These resins offer exceptional detail, high-resolution finishes, and are available in a variety of colors. Jewelry resins can produce intricate designs that capture fine details, making them ideal for the jewelry industry.
Powder-based Materials
Powder-based materials are used in 3D printing technologies like Selective Laser Sintering (SLS) and Multi Jet Fusion (MJF). These technologies use lasers or heat to selectively fuse powdered materials to create solid objects. Some common powder-based materials include:
SLS (Selective Laser Sintering) materials
SLS materials encompass a wide range of materials, including nylon, TPU, and metals like aluminum or titanium. SLS allows for the creation of complex geometries and provides excellent mechanical properties. This makes it suitable for functional prototypes, end-use parts, and even aerospace applications.
MJF (Multi Jet Fusion) materials
MJF materials are predominantly used in industrial applications due to their speed and high-quality results. MJF utilizes thermal energy and a fusing agent to selectively bind layers of powdered material. This technology offers great precision, isotropic strength, and is commonly used in the production of functional parts and manufacturing processes.
Post-processing Techniques
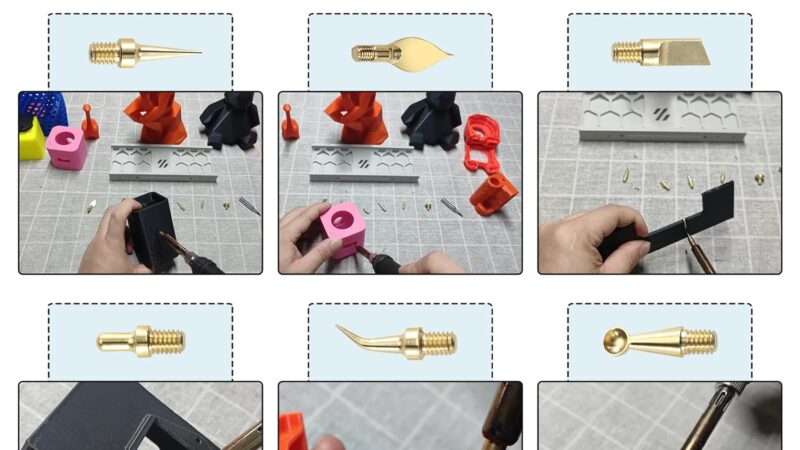
Removing support structures
Support structures are temporary structures that are necessary to print overhanging or complex geometries. After the print is complete, these structures need to be removed. This can be done by manually breaking or cutting them away from the printed object. Care must be taken to avoid damaging the printed part during the support removal process.
Sanding and polishing
To achieve a smoother surface on 3D printed objects, sanding and polishing techniques can be applied. This involves using sandpaper or sanding tools to carefully eliminate layer lines or imperfections. After sanding, polishing compounds can be used for further smoothing and improving the overall aesthetic appearance of the print.
Painting and finishing
One of the advantages of 3D printing is the ability to create objects in various colors and finishes. After printing, the object can be painted using different techniques such as brush painting, airbrushing, or even dip coating. Finishing touches like clear coats or post-processing effects can provide added durability and enhance the visual appeal of the printed object.

This image is property of pixabay.com.
Applications of 3D Printing
Rapid prototyping
One of the major applications of 3D printing is rapid prototyping. The ability to quickly transform digital designs into physical objects allows for rapid iteration and testing of product ideas. 3D printing enables designers and engineers to validate concepts, make design improvements, and reduce development time and costs.
Product design and manufacturing
3D printing has revolutionized product design and manufacturing processes. It allows for the creation of highly customized and complex designs that would be otherwise difficult or expensive to produce using traditional methods. The ability to produce functional prototypes and end-use parts on-demand has opened up new possibilities in fields such as consumer products, electronics, and automotive manufacturing.
Medical and healthcare
The medical and healthcare industries have greatly benefited from 3D printing technology. From producing custom prosthetics and implants to creating patient-specific surgical guides and models, 3D printing has significantly improved patient care and treatment outcomes. It has also enabled advancements in bioprinting, which aims to create living tissues and organs for transplantation.
Education
3D printing has become a valuable tool in education, allowing students to explore concepts in a hands-on manner. It promotes creativity, problem-solving, and critical thinking skills. Students can design and print their own objects, bringing their ideas to life and gaining a deeper understanding of various subjects, including science, engineering, and art.
Art and creativity
Artists and creatives have embraced 3D printing as a means of exploring new artistic expressions. The technology enables the production of intricate sculptures, jewelry, and customized pieces that push the boundaries of traditional art forms. 3D printing empowers artists to bring their imagination to life and create unique pieces that were previously challenging to realize.
Automotive and aerospace industries
Both the automotive and aerospace industries have harnessed the power of 3D printing to improve efficiency and create complex components. 3D printing allows for lightweight designs, customization, and rapid prototyping, all of which are critical in these industries. From engine parts to aircraft components, 3D printing has played a pivotal role in advancing these sectors.
In conclusion, 3D printing has transformed the way we design, create, and manufacture objects. By understanding the basics of 3D printing, the inner workings of a 3D printer, and the materials used, you can unlock the full potential of this revolutionary technology. Whether you’re a hobbyist, a professional designer, or an industry expert, the possibilities with 3D printing are endless, and the future holds even greater advancements in this exciting field. So go ahead, unleash your creativity, and bring your ideas to life with 3D printing!